Tres Leche Cake
Written By: Rachel
This is by far one of my favorite recipes, however it took me until my late 20’s to even find a liking for tres leche cake.
If anyone knows my mum, Sharon, she is the best cook I know! But, the first time I had ever tried tres leche was the same night mum tried making it for the first time. Let’s just say the milk mixture should be somewhat thick so it’s not like eating cake soup. Follow my recipe and you won’t have cake soup.
We have a local Mexican restaurant here that makes a fabulous tres leche cake and one night I was craving sweets so I ordered it. I fell in love! As a lover of baking I naturally then had to try my hand at it. After trying several recipes and making a few adjustments I now have this recipe. I really hope you give it a go and try it even if you, like me, had a bad tres leche experience in the past.
This recipe is easy to follow but may be a little complicated for beginners as there are a few techniques you’ll need to know how to do like folding and whipping up egg whites to a stiff peak. So without further adieu, here is the Tres Leches Cake!

Ingredients
Spoons & Cups
Cake Base:
All Purpose Flour- 1 cup
Baking Soda- 1 ½ tsp.
Salt- ¼ tsp.
Eggs (seperated)- 5 large
Sugar- 1 cup separated
Vanilla- 1 tsp.
Milk- ⅓ cup
Milk Mixture:
Evaporated Milk- 17 fluid oz
Sweetened Condensed Milk- 14 fluid oz
Heavy Whipping Cream- ¼ cup (2 fluid oz)
Topping:
Heavy Whipping Cream- 1 pt
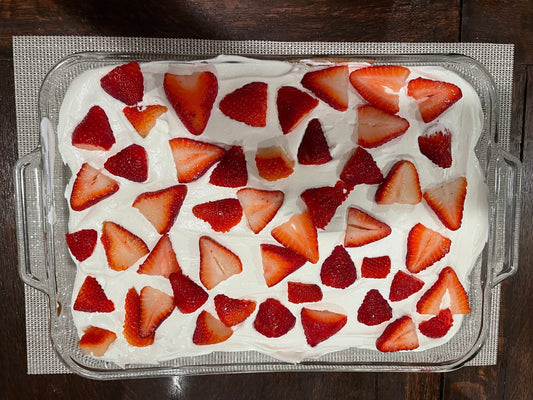
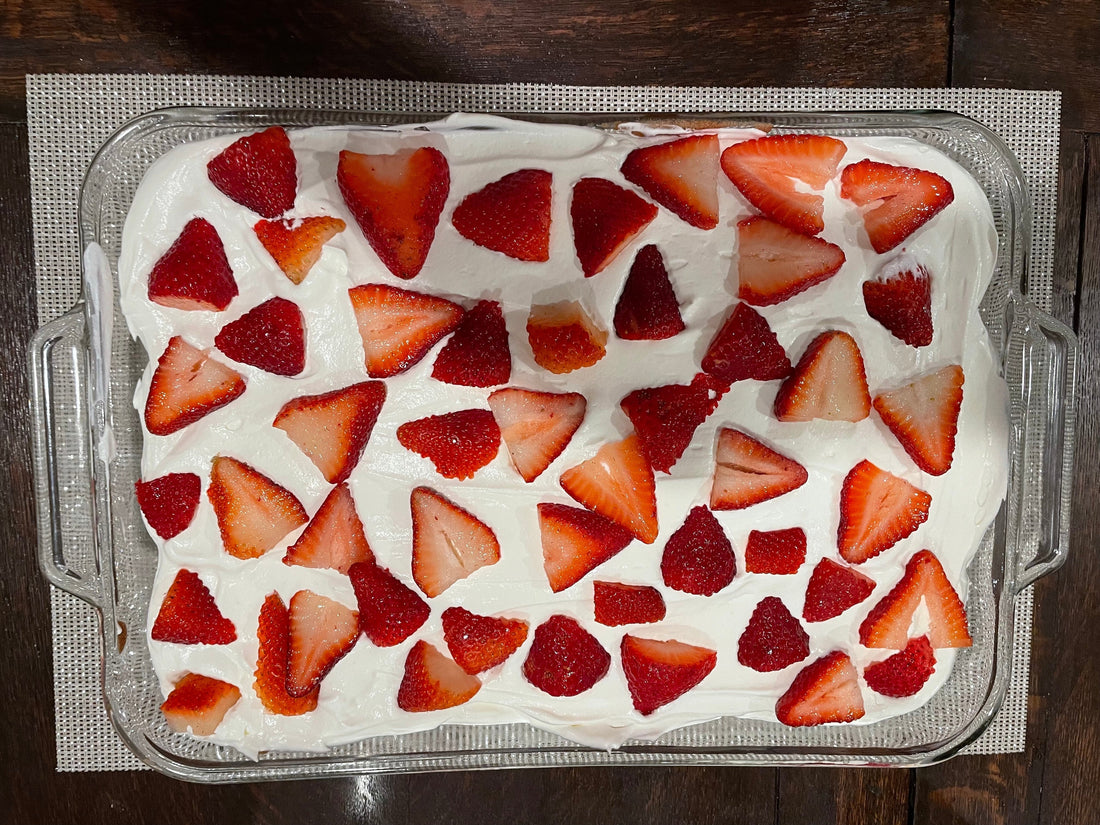
Fruit of your choice
Grams & MLs
Cake Base:
Plain Flour- 125 grams
Bicarbonate of Soda- 1 ½ tsp.
Salt- ¼ tsp.
Eggs (seperated)- 5 large
Sugar- 200 grams separated
Vanilla- 1 tsp.
Milk- 79 ml
Milk Mixture:
Evaporated Milk- 503 ml
Sweetened Condensed Milk- 414 ml
Heavy Whipping Cream- 59ml
Topping:
Heavy Whipping Cream- ½ liter
Fruit of your choice
Directions:
1. Preheat Oven to 350º F / 178º c.
2. Spray or rub a 9″x13″ / 23×33 cm pan with butter or oil to help release the cake later. If you line the pan with parchment paper, you’ll need to transfer it later to a serving dish. I like to serve mine in the dish I’ve baked it in.

3. Combine flour, baking powder/bicarbonate of Soda, and salt in a small bowl. Set aside.
4. Separate Eggs and set the whites aside. *Note: you don’t want any yoke in your whites as we will whip them later.
5. Beat the egg yolks with ¾ cup / 150 grams of your sugar. Beat until pale yellow in color.
 |
 |
 |
6. Add your Milk and vanilla to the egg yolk mixture. Mix until combined.
7. Comine the yolk mixture with the dry ingredients from step 3. Mix until combined and set aside.
8. In a new mixing bowl whip the egg whites on high speed to form soft peaks. Once soft peaks are reached slowly pour in the remaining sugar, ¼ cup / 50 grams, while the mixer is on the slowest setting. Once all of the sugar is added, speed the mixer up and bring it all to stiff peaks.
9. Fold the egg whites into the yolk and dry ingredients batter. I like to do this one third of the whites at a time. Fold until no white can be seen and everything is smooth. The air bubbles you see are good. DO NOT tap the bowl or pan to remove them.


10. Pour into your baking pan and spread out into an even layer. Bake in the oven for 35-45 minutes.
11. While the cake bakes combine your milk mixture ingredients in a small pitcher. Mix it until combined nicely. Then put it in the fridge until step 14.

12. You know the cake is done when it is spongy in texture and a toothpick or knife can be inserted and come out clean. Let the cake cool to room temp. Once cooled, transfer to a serving plate if needed.
13. Stab the top of the cake with a fork all over. Make sure to get the edges of the cake and when stabbing down go deep enough to hit the middle or bottom of the cake.


14. Pour the milk mixture all over the cake, making sure to really saturate the edges of the cake. I like to only pour about half of it at once and save the rest for later if you need more.
15. Let the cake rest in the fridge for at least 3 hours to let it really soak up the mixture. I find it is even better if you can give it 5-6 hours in the fridge.
16. Just before you are ready to eat, beat the whipping cream for the topping. Bring it to stiff peaks adding a little bit of icing sugar for a sweeter taste. (3 tablespoons of icing sugar) At this time also wash and cut your fruit. *Note: The recipe calls for 1 pt/ ½ L of cream, I find that is a lot of whipped cream for my taste, so if you’re like me you can get away with half that.
17. If the cake is looking dry you can add a little bit more of the milk mixture at this time but you may not need to. Add you whipping cream and fruit to the top of the cake. Cut, serve, and enjoy!